Building Details
The building details tab will allow you to edit your dimensions, frames, bays, roof pitch, slab connection, and knee brace preference. To view this click the Building icon in the designer.
At the top of the building details page you can see the details of the building category you’ve chosen to use and the windspeed for your site address.

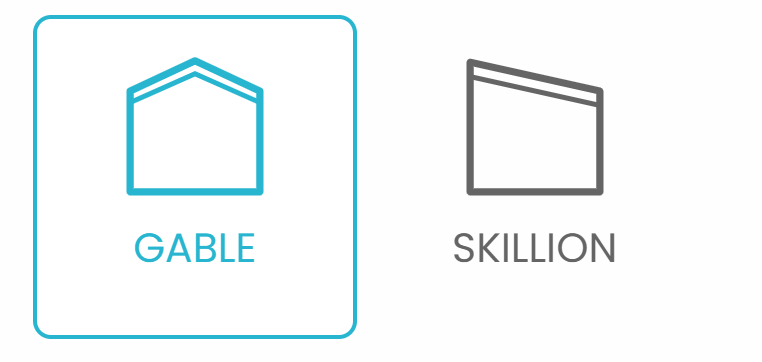
Gable Vs Skillion
Carports and garages can be created as either gable or skillion designs. To edit this simple select the relevant icon at the top of the Buildings tab.
Dimensions
To edit your Width and Height simply type in the new value and then click elsewhere on the screen to apply the change.
Changing the length of your building will also edit the bays and so this is done slightly differently. Select the “edit” icon next to the length measurement.
You can then fill in the new length of your building before clicking Suggest Bays.
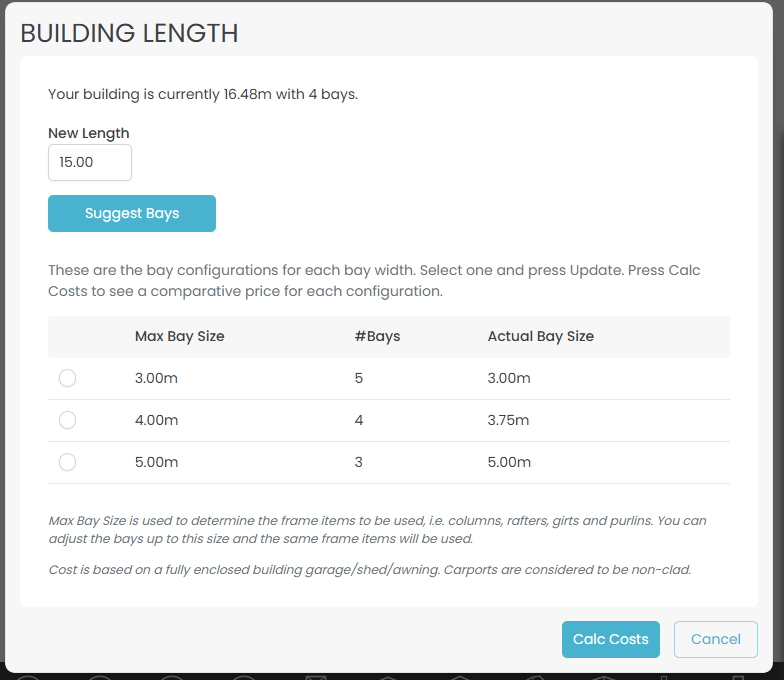
To see how the different bay sizes will impact the cost of your design click Calc Costs.
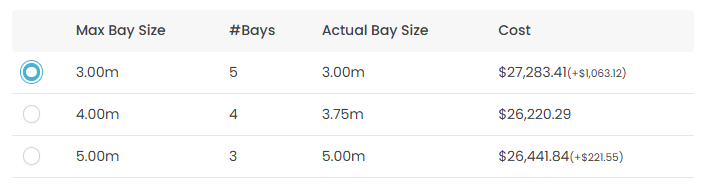
Once you’ve decided which bay option you would like, select that option and click Update.
Roof Pitch
Different building categories will have different roof pitches available, as will gable and skillion designs. The roof pitch drop-down will show the options available for your current building.
If the degree you want doesn’t show, check to see if you can do your design using a different building category, then contact the Quotec support team about a custom design quote.
Slab Connection
Depending on the size of your design, you may be able to select either In Slab or On Slab connections. The default option chosen will depend on your settings. See Slab Connection/ Footing Bracket for details.
Knee Brace
You can choose either “Knee Brace” or “No Knee Brace - If Possible”. Selecting “No Knee Brace” does not guarantee your design will be created without knee braces; this will depend on the restraints of your building dimensions so check your design to make sure.
See Knee Brace for details on setting your default preference.
Bays
The bays section will list each bay currently in your design and its width.
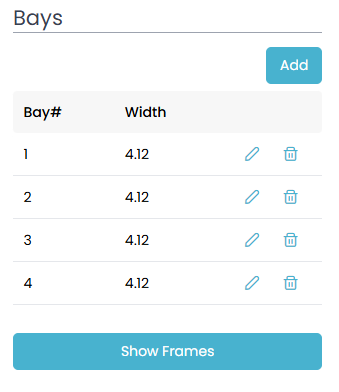
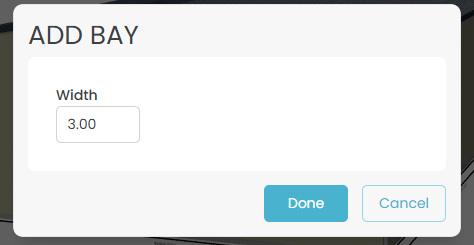
To add a bay to your design simply click the Add button and then fill in the width.
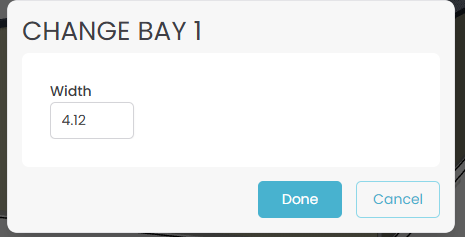
If you’d like to edit the width of an existing bay simply click the edit icon next to the bay you wish to change. This pop-up will tell you the number of the bay you’re changing and allow you to edit the width.
Adding bays or editing the size of existing bays will change the overall length of your building.
Cladding
Select between either vertical or horizontal cladding to have the cladding of your building immediately updated.

Frames
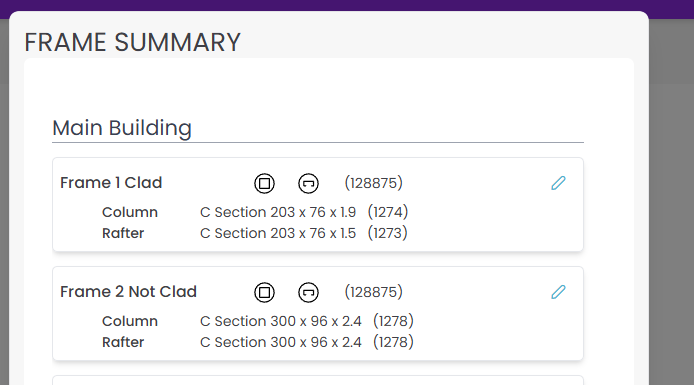
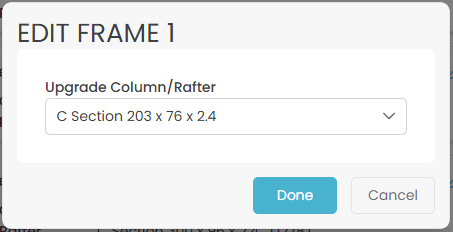
At the very bottom of the building details tab is the Show Frames button. Through here you’ll be able to upgrade the frames used for your building and swap between C-Section and SHS.
The Frames details will be split into Main Building and Left Awning or Right Awning if you have either.
Each section will show the relevant column and rafter details for each included portal frame.
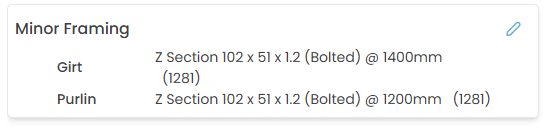
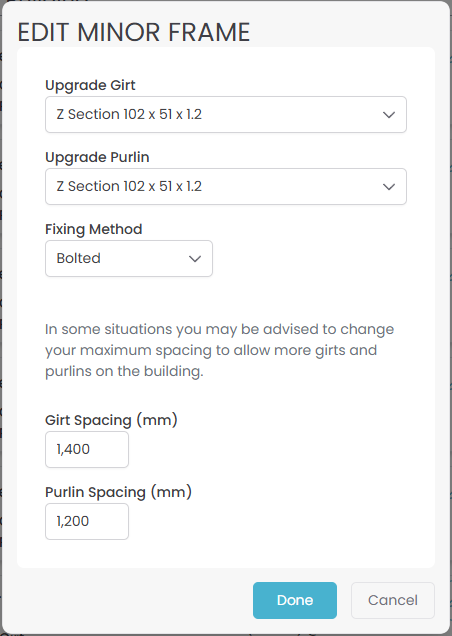
Within the Main Building section you will also be able to see the minor framing details (girts and purlins) including the items used as well as the spacing.
To upgrade any of these framing details simply click the blue edit icon next to the frame you wish to upgrade.
Major Frames:
Minor Framing:
Here you can also swap between bolted or screwed connections.
Once you’ve upgraded your framing this upgrade will show on the frame details.

To revert back to the original framing simply click the Bin icon that appears next to the edit frame icon.